Saturday, August 20, 2011

From crummy to cute.

My brother owns a construction and roofing company, Seth Molen Construction.  Recently, he's purchased a few houses that I don't want to say he's flipping, but he's improving, and renting them.  His last "find" was quite the gem.  The previous tenant had dogs (I think 5?) and chickens in the house.  It was left in a complete, disgusting mess, and guess who got to deal with that?

**Waves hands like crazy!!**

That's right.  Me.  And my mom.  The dynamic duo.

I know a post like this is worthless without pictures, so here are a couple "before" shots:


No joke, huh?  That is N-A-S-T-Y.  What you can't see in these pictures are the ceilings and light fixtures that were covered in cobwebs and orange fly feces.  Yummy, right?  Well, after weeks of scrubbing every room of that house, floor to ceiling, and painting until our hands were one solid callus, it was done.

Ta da!


The floors still have to be tiled/carpeted, but holy wow- it's a huge improvement.  

Anyhow, that's why you haven't seen much from me lately.  That house has really zapped my energy...but I do have something else to show you, as soon as I get some sleep.

Saturday, August 6, 2011

Take her for all she's worth

Two posts in less than 24 hours-- what what??  Well, I had to share what hubs I found today with you guys.  I have a project I'm working on that I hope to be able to show you a little later this week.  I've been needing some foam for it.  When I went to the fabric shop to price it, I found out it would be around $70 for a piece in the size I needed.  Ridiculous.  Not going to happen.  So, in the footsteps of  Little Miss Penny Wenny I followed, searching for a couch from which I could rob the cushions.

Today it happened...and we all have my ever-complaining-that-I-have-too-much-junk hubs to thank since he alerted me to this beauty curbside.


Loverly, isn't she?  Well, she has some things going for her.  She's clean (aside from that little mark on her side)...and she's a hide-a-bed thing, only without a real mattress which means more foam!  So I started ripping into her.


I was completely shocked to find out just how much was foam...and to see that all that remained was Styrofoam   Seriously.  Styrofoam.  There were two little strips of wood that were there to tack fabric to, and that was it.  So I stripped her down, took her for all she was worth, and left her skin and bones Styrofoam and cover.


And took all this inside to hoard in my little project room.  *Mental note-- must find more chairs for all this foam!


Have you ever considered taking a free couch home, just to steal the goodies inside (and no, I don't mean that piece of stale cracker, and $.07)?

How to cover buttons.

Hello, friends.  I'm alive, I promise.  Remember my last post, about having a ton of projects to work on?  Well, what would a DIYaholic be if she couldn't finish all of those before adding to the list?  Not worthy of "aholic" after her name, that's for sure...and since I am worthy of such a title, it's only fitting that I added three other pieces to that project list of mine.  I promise, you'll see some progress soon.

Until then, I'm going to share a little piece of one of those projects with you here as I show you how to cover buttons.  It really is so simple, and such a great way to coordinate with fabrics you're using on projects.  P.S.-- if you cringe when you see dirty hands, don't read this.  We'll just say I had a black spray paint mishap today, and leave it at that.

Here's what you'll need:


  • Section of fabric
  • Button cover kit
  • scissors
  • hammer

First, open your kit and make sure all pieces are present.  You can find a button cover kit at any craft store.  I picked up a 5/8" kit with a 40% off coupon for less than $2.50.  Your kit should include a circle template (mine was part of the packaging that I cut out from the cardboard, so be careful when opening the package), mold, pusher, and button shells and backs.  Then lie your template on your fabric, and draw circles centered around the area you would like to show on your buttons.  Now, cut the circles out of your fabric.


Place the round of fabric wrong side up in the mold, and push the button shell down into the mold.


Then fold and tuck the extra fabric inside the shell.


Place the back down on top of the shell.


Now, place your pusher over the back, and with the mold on a hard surface, press down firmly.  You may be able the press the entire button down this way, but I found that it would go half way, and get stuck.  It needed a little extra power on it that was more than what my thumbs were able to give, so I gave it a few gentle taps with a hammer.


Once the back is set down evenly within the mold, you're done!  Turn the mold over and push on the center to pop the button out.


That's it!  You have cute, professional looking little buttons to match your project!


Stay tuned to see where these little buttons end up!

Thursday, July 28, 2011

So many projects, so little time!

Hello friends!  I'm back to show you my recent finds in their unaltered "before" states, as promised at the end of my last post.  I've been so anxious to show you all what I'll be working on the upcoming weeks that it's been killing me to even wait a few days to do it!

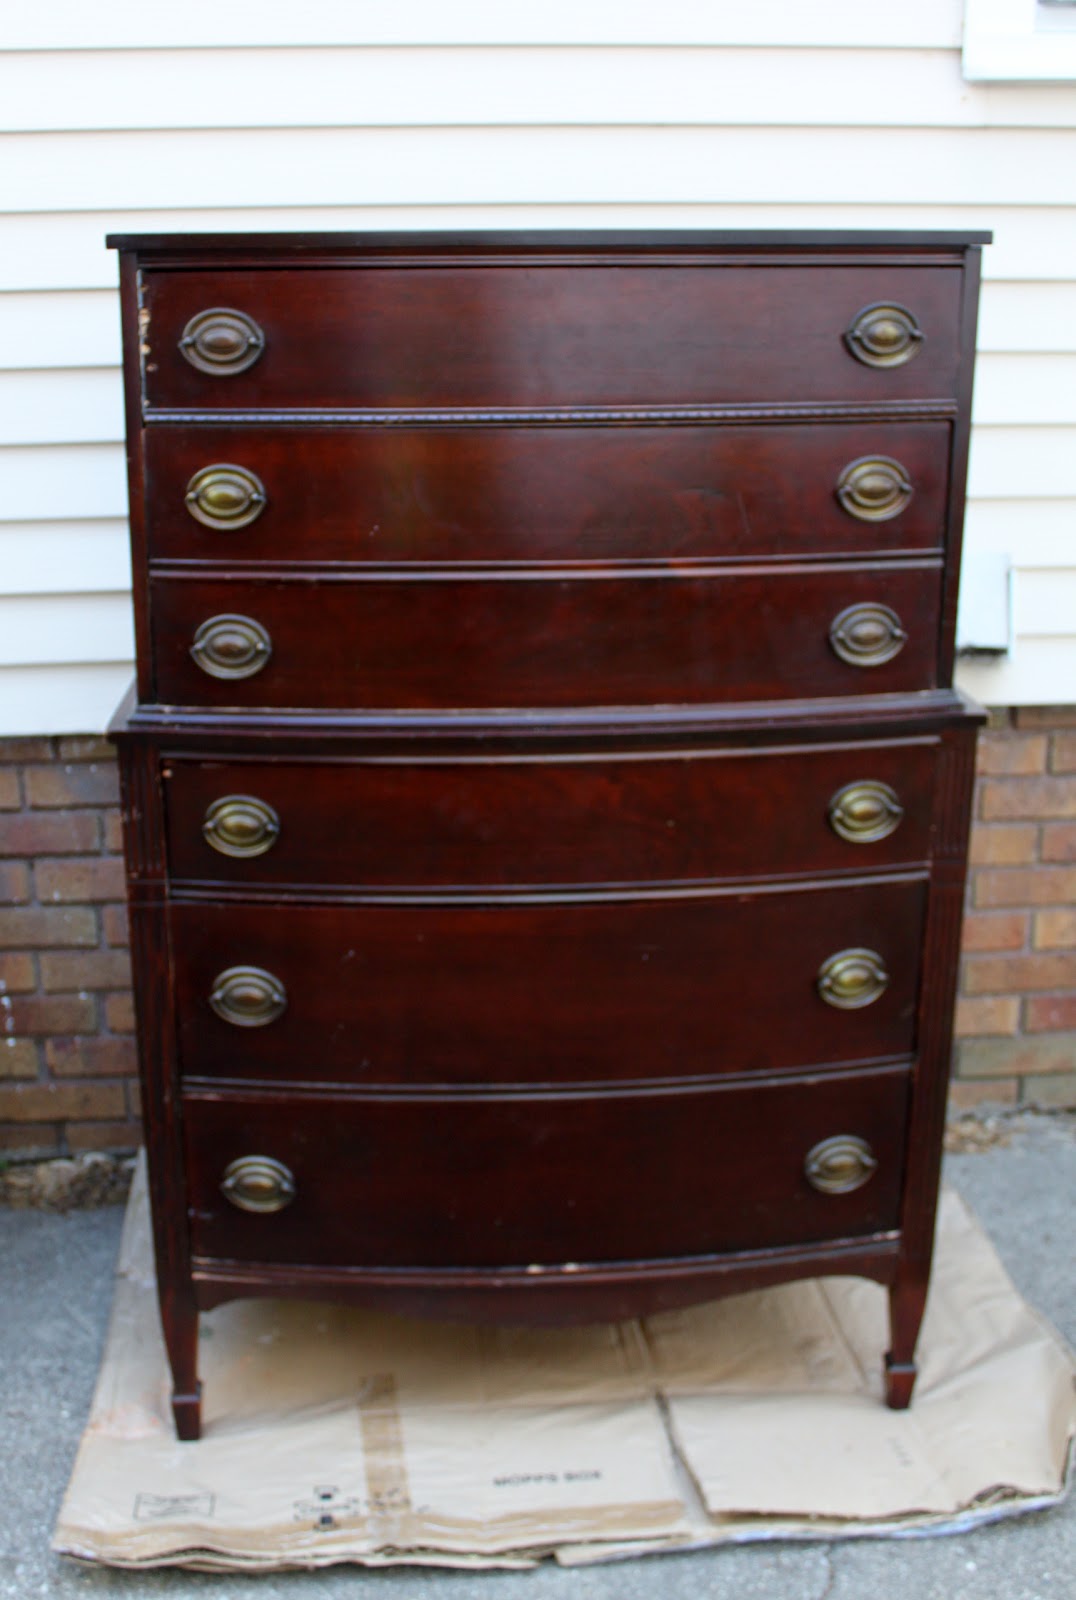
I feel like such a cheater.  No sooner than I had painted Betsy, this beautiful dresser popped up on Craigslist. The price?  A whopping $30!


Dear, God!  Can you feel the love?  I could hardly call the poor woman fast enough to take this off her hands before she moved.  When I went and picked it up, she told me that she was glad someone responded and she didn't have to throw it in the garbage.  WHAT?!  Who in their right mind would throw away such a beauty?  She's an antique!  She's mahogany!  She has GREAT legs, and just look at that original hardware!!  I snatched her right up, loaded her in my SUV and drove 15 minutes home, her legs hanging precariously out the back.  

Unfortunately, she's really not in the best shape, and will need to be painted.  I'm going to have to completely reassemble the top drawer, fill in a handful of spots of missing veneer, and re-glue some of the decorative scallop along the bottom and the veneer on the sides.  Still...I love this dresser.  LOVE.  But I just finished Betsy.  What to do!?  I really want to have a nice yellow accent piece in my room, but I don't know that I can bring myself to do it to this girl.  She will likely end up a creamy white, or a dark grey...unless I get REALLY bold.

The next two pieces I picked up were from one of the strangest shops in town.  It's almost like an antique shop with individual little booths, only this shop doesn't have a lot of antiques (it may, on an off chance), but rather a ton of vintage furniture pieces, a few exciting finds, and ton of junk you'd find at any other thrift shop.  The shop itself wreaks of musty, old, goodness.  Don't get me wrong...I couldn't work in a place that smelled like that.  I'd sneeze all day long, but to me, that smell means furniture gold mine.  It's the kind of hole in the wall place most would walk into and walk right out of, but there are SO many nooks and crannies to find fun pieces in, that it may be one of my favorite stores.

Anyhow, I found two cute items there.  This adorable little jewelry chest for $8 that looks like it may be wearing the furniture version of Joseph's coat of many colors.  Seriously...every part of this little thing is a different wood color.  She's not solid wood, but she's so cute with her busty top and stubby legs. 


And inside her spacious drawers with that lovely black velvet lining that attracts everything under the sun...


I also picked up this cute little frame.  It looks like a Sryroco frame from the 60's-70's?  I don't know, but I love, love, LOVE it and have the perfect project figured out for it.  I scored this for a whopping $4!
.


My last find has me venturing into uncharted territories... yes, friends.  Upholstering.  This little cane back chair sat at Habitat for Humanity for over a week, which is like an eternity to stay in that store.  I've been there before where in a twenty minute time frame, the workers bring out 6 new pieces.  Stuff goes fast.  Sadly though, this little chair hadn't found her love.  I can't imagine why.  The seat is disgustingly stained, and the wood is finished in this beeeeeeutiful faux distressing.  She's on solid legs though, and her caning is perfect.  Everything else is superficial.  When I went back a second time and she was still there, I had to have her.  And she was only $5, which included a matching nasty stained pillow.  How could I refuse?  I could spend more than that on a trip to Starbucks!


Whew!  I'm so glad to finally share all of my finds with you.  What cool pieces have you found lately?

Monday, July 25, 2011

Sometimes it pays to be a little creepy.

I had such a great weekend.  It all started with a little trip with Charlie.  Who's Charlie?  You mean you haven't met this little clown?  Well, allow me to introduce you.


Charlie is my French Bulldog, which very well may be the best breed of dog out there.  If you have a bucket list, I'd suggest adding "own a Frenchie" to it.  Seriously.  He has the best personality.

Anyway, back to the trip.  Charlie is 1 1/2 years old.  He's the little brother to Chloe, our 4 year old Boston Terrier.  We've had him since he was all of two pounds and eight weeks old.  This weekend, our local humane society sponsored a microchip and dog wash clinic.  We took part, and took the little goof to get chipped.

Hubs came along to help out (which was SO needed with a dog, a toddler, a bunch of kiddie pools, and 96 degree weather) even though he was on call.  Afterwards, he took Charlie home for a cool down since it was SO hot out, and Mason and I went to Target.  Not five minutes after getting home he was paged in, and called me on the way into the hospital to let me know.  That's where the fun began.

My funny little hubby...he complains that one of the things that he loves about me is also one of the things that drives him crazy.  I am an all in type of person.  When I get on a kick, I REALLY get on it...and lately, I've been a machine about finding steals on furniture.

While he's driving to work, telling me how I should be on the show "Hoarders" he stops mid-sentence to tell me-- his furniture obsessed, furniture hoarding wife-- that there's a FREE hutch sitting beside the road.

What's a girl to do?  Forget about it, or go take a look?  Well, of course I went to look at it, and of course I picked the darn thing up because I've been dying to work on a little snack shop for Mason to play in like the one Beckie at Infarrantly Creative made for her son.

As I drove on from picking up my free find, I noticed the owners of the residence had their garage completely open, and had tons of old furniture and goodies sitting outside.  As I drove past, I took one good rubbernecking sort of look, and then I saw it.  (Enter creepiness.)  I turned my car around and slowly pulled up next to them, rolled my window down, and half shouted out my window to the guys working in the garage.

"Hey- are you guys having a garage sale...or moving...?"

"No.  Why?  Do you see something you want?"

"Maybe.  Do you care if I get out and look?"

So I did.  I walked past two big bookcases, around to the back where I saw the back side of what I was hoping would be a huge, gaudy framed mirror...and BINGO.  There she was.


I asked them if they were willing to sell me the mirror.  The looks on their faces told me they weren't envisioning what sort of glory she could be with a little paint, but for $5 she could be mine.

$5.  That had to be fate.  I don't usually carry cash, but that day, I just so happened to have $5, and only $5 in my wallet, and the desire to take that mirror.

Eeek!  How lucky right?  See?...Sometimes it pays to be a little creepy.  Check back soon to see the transformation, and a few more finds from this weekend!

Thursday, July 21, 2011

They called her mellow yellow.

She's a mellow yellow girl, that's for sure.

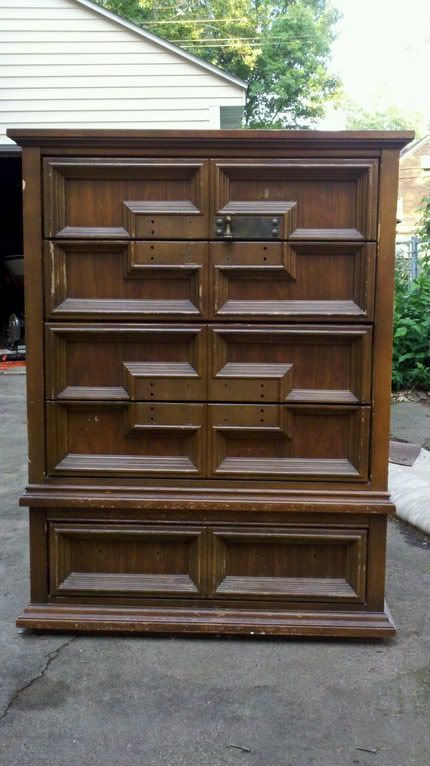
This is Betsy.  Wasn't she a sad little dresser?


Note that she DID have all her hardware, but I was impatient and started to work on her right away before I thought about getting pictures...and unfortunately all of these before pictures are poor quality from my cell phone.


She was free from a lady on Freecycle who wanted her out of her garage.  She'd certainly served her purpose for years to someone named Jennifer, possibly a Jem, and a couple of other names I found written and/or carved into her top, sides, and drawers.  Betsy wasn't the best possible candidate since she's not solid wood but not the worst either.  The rails (horizontal framing) and stiles (the sides, or the two vertical pieces of the frame) are solid from what I can tell, as well as the molding, but the top is veneered, but with a nice old vaneer that was thick enough to withstand enough sanding to get the carvings out.

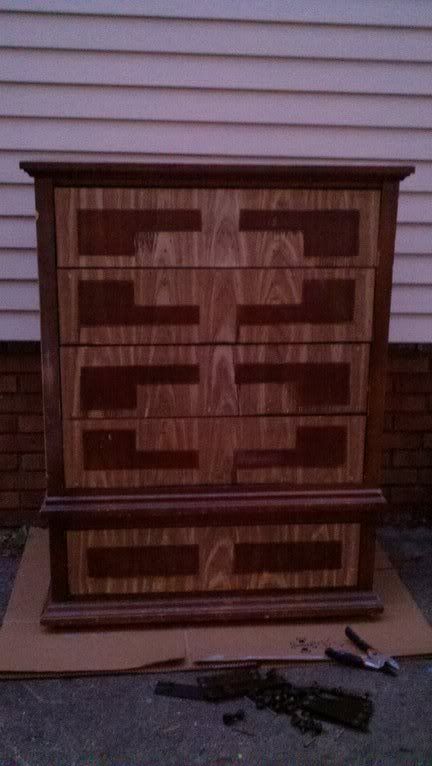
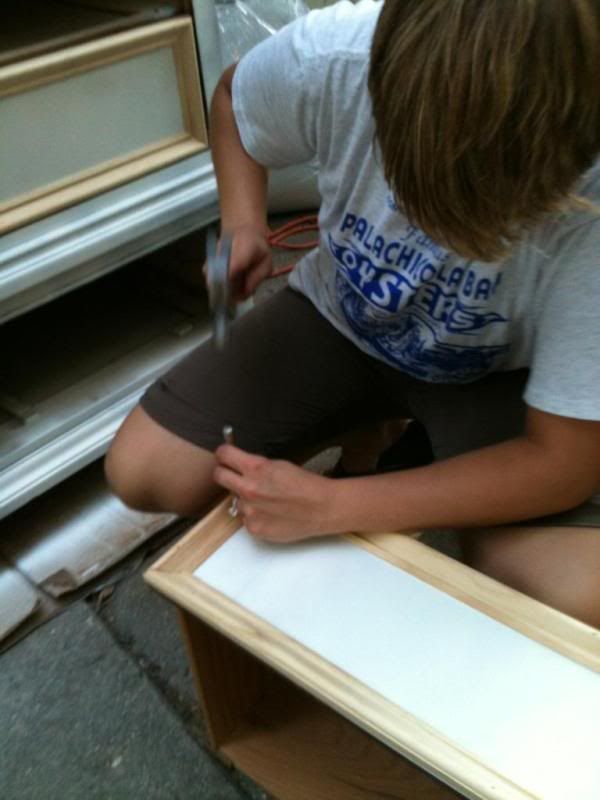
As I started sanding the front, I quickly figured out that those beautiful endearing fronts were just big clunky plastic pieces that were tacked on.  They had to go, so I spent a good twenty minutes with a thin screwdriver prying them from the drawer fronts, and started filling in any missing chunks or deep gouges with wood putty.


Beautiful, right?  I continued sanding her down with my dustless Craftsman random orbital sander that I picked up at Sears on sale for ~$35.  After all the names were removed, and all the protective coating sanded down, I wiped her down, and started priming with Kilz original spray paint.


I wasn't very happy with the results from the Kilz spray.  It had too many spots where it bubbled and needed to be sanded away completely to fix it.  I sanded those spots well, and went all over her with a fine sanding sponge just to smooth the finish out.  I just didn't like the look of the drawers without any molding.  She looked more sad than before to me, so I ran out and bought new molding at Lowes for around $30.

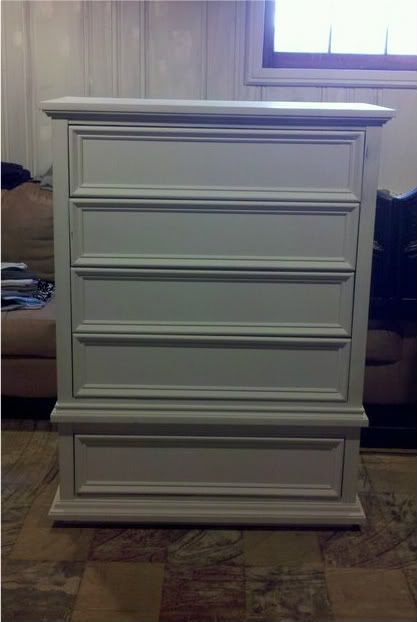
I measured, and cut the pieces, and applied them with wood glue and brad nails (using a set to push them deeper).  Then I covered the holes with more wood putty, and sanded them smooth.  I used a caulk in the corners and around the inside and outside of the new trim to make the drawers look seamless.


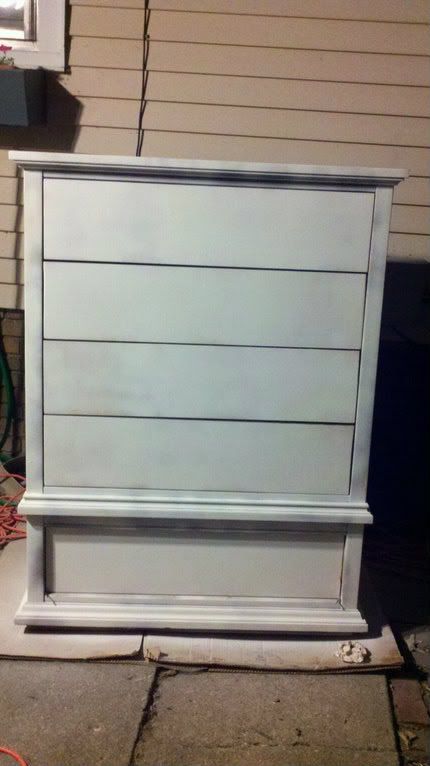
Then I re-primed her with latex Valspar high hiding primer I had on hand, and a paintbrush, making sure to use long strokes in the direction of the grain.

(You have to overlook the surroundings...the basement has been one of those long ongoing projects that I swear will be finished someday!)

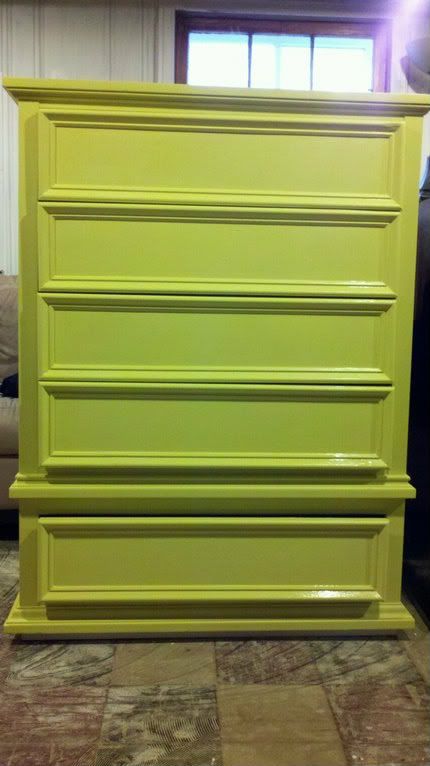
Isn't she looking so much better with a face lift?!  I sanded her lightly again to get rid of any brush strokes, and painted her a pretty yellow color I picked out at Lowe's (citrus/lemon something or another).  For the paint on ol' Betsy, I used Valspar in a satin latex finish as lower sheens tend to hide imperfections better than gloss finishes.  Two coats of paint, and I was left with this bright yellow dresser.


 I have loved the idea of a yellow dresser in my grey room with the cream trim for a long time, but seeing Lindsay's dresser over at Living with Lindsay really set the color for me.  I love her finished dresser, but didn't want to go quite as distressed, and also couldn't take the jump to do mismatched pulls.

Anyhow, after letting her dry, I scuffed up the edges a little with a 100 grain sandpaper, and then went over that with a fine sanding sponge to really smooth it out.  Then I stained her with Minwax stain in dark walnut.  After the stain dried, I put a nice coat of polyurethane on.

The final step was hardware, which I realize I should have drilled holes for in the beginning before the paint process.  I used the original hardware from the bottom drawer, and some other hardware I picked up at my local Habitat for Humanity Restore for $.25 a piece.  I cleaned them off really well with soap and water, and scrubbed them with a metal brush to scuff the finish, and then sprayed them with Rustoleum's oil rubbed bronze with built in primer.

The last final detail touch was to line the drawers.  I used a wrapping paper from Hallmark for this task, and I will do a how-to on it soon!  All that, and Betsy finally has a new life.

Let's take another look at the before again:

And finally, here she is after in her new life!


Big difference, right?  I'm always amazed at what a little extra trim and paint will do for a piece! I think I'm more in love with her than I should be...which is more than I can say about my Hubs.  He's not digging the yellow, and thinks I'm crazy for painting her that color.  What do you think?

Welcome!

Hi, friends!  I want to take the time to welcome you Confessions of a DIY-aholic.  I am a new blogger, so bear with me for a little while until I get the hang of this site.  I have to admit that my computer/gaming skills probably peaked when I was in grade school.  Remember the Nintendo 64 and The Oregon Trail?  Yeah...I could rock those out.  Today, I can't even figure out what all the buttons on modern gaming controllers do, or start to tell you what html codes go where.  I always wondered when I would become my mother, but it's becoming blaringly obvious that I've been evolving into her all along!

At any rate, I'm really excited to share this time of my life with you guys!  I really love being a housewife, but cannot deny that I'm somewhat domestically challenged when it comes to the whole cleaning and laundry part of the job.  It's not that I can't do it, it's that I can find so many other things I'd rather do!  I mean, really, who LIKES doing laundry?  Not I, friends, not I.  No, I'd much rather spend my time rummaging through thrift shops, shopping for Craigslist finds, and re-purposing furniture and other odds and ends to decorate my house.  With this blog, I hope to motivate at least one person to tackle some DIY (do it yourself) projects the way so many other bloggers out there have given me the nudge I needed to get going.  I'll be sharing with you my DIY projects and ideas on cooking, baking, giving furniture and other odds and ends new life, and of course, you'll probably hear about my cute little family from time to time.  I hope you enjoy the site!