Tuesday, September 20, 2011

One stop shop, furniture finds.

I've been promising for a week now that I'd share a few fun finds.  Last weekend Hubs and I went down to pick up a new set of tires for our car in St. Louis.  Since we were down there, I peeked on craigslist to see if there was anything I had to have.  Well, there was.  Luckily, the seller responded right away too, and we headed over.  The little dresser was in the basement, so we trekked down stairs to take a look.

Enter rush of excitement.  The basement was full of goodies!!  The couple who owned the house told us that the furniture was all in the house when they bought it, and they didn't want it, so they were trying to get rid of it...and for some really amazing prices (aka-- well within my budget! Weee!)  

Umm...I'll take it!

After we left, Hubs told me that his thought when we walked down the stairs went something like, "Oh, crap. There's no way we're leaving with just one piece."  Well, for the record, we did...


...that night.  And OMG!  She matches the little French table I just finished.  She's a little taller, and has a little different details, but how funny to pick up such a similar piece in such close timing, right?

Anyway, I picked up a trailer, and headed back down the night after, little brother (aka- the muscle) in tow.  I pretty well fixed their problem of wanting to get rid of the stuff.  If you offer it, I will take it.  


This is one of my favorite pieces from the trip.  A claw foot bookcase/cabinet.  It's in great shape, and really just needs some conditioning.  No paint for this pretty boy.  Not pictured are the glass doors, and shelves, but they're all there.  I LOVE this piece.  Claw feet make me swoon.

I also picked up a bedroom set that has the dresser, mirror, and bed.  There was also the original little dresser I originally set out to pick up...you know, the one that started it all?  She's upside down below.


The last piece I originally set out to take home was this cute little side table.  The drawer needs repair, and the top is really rough, but it's cute, and I think she can pull herself together to be a show stopper again.


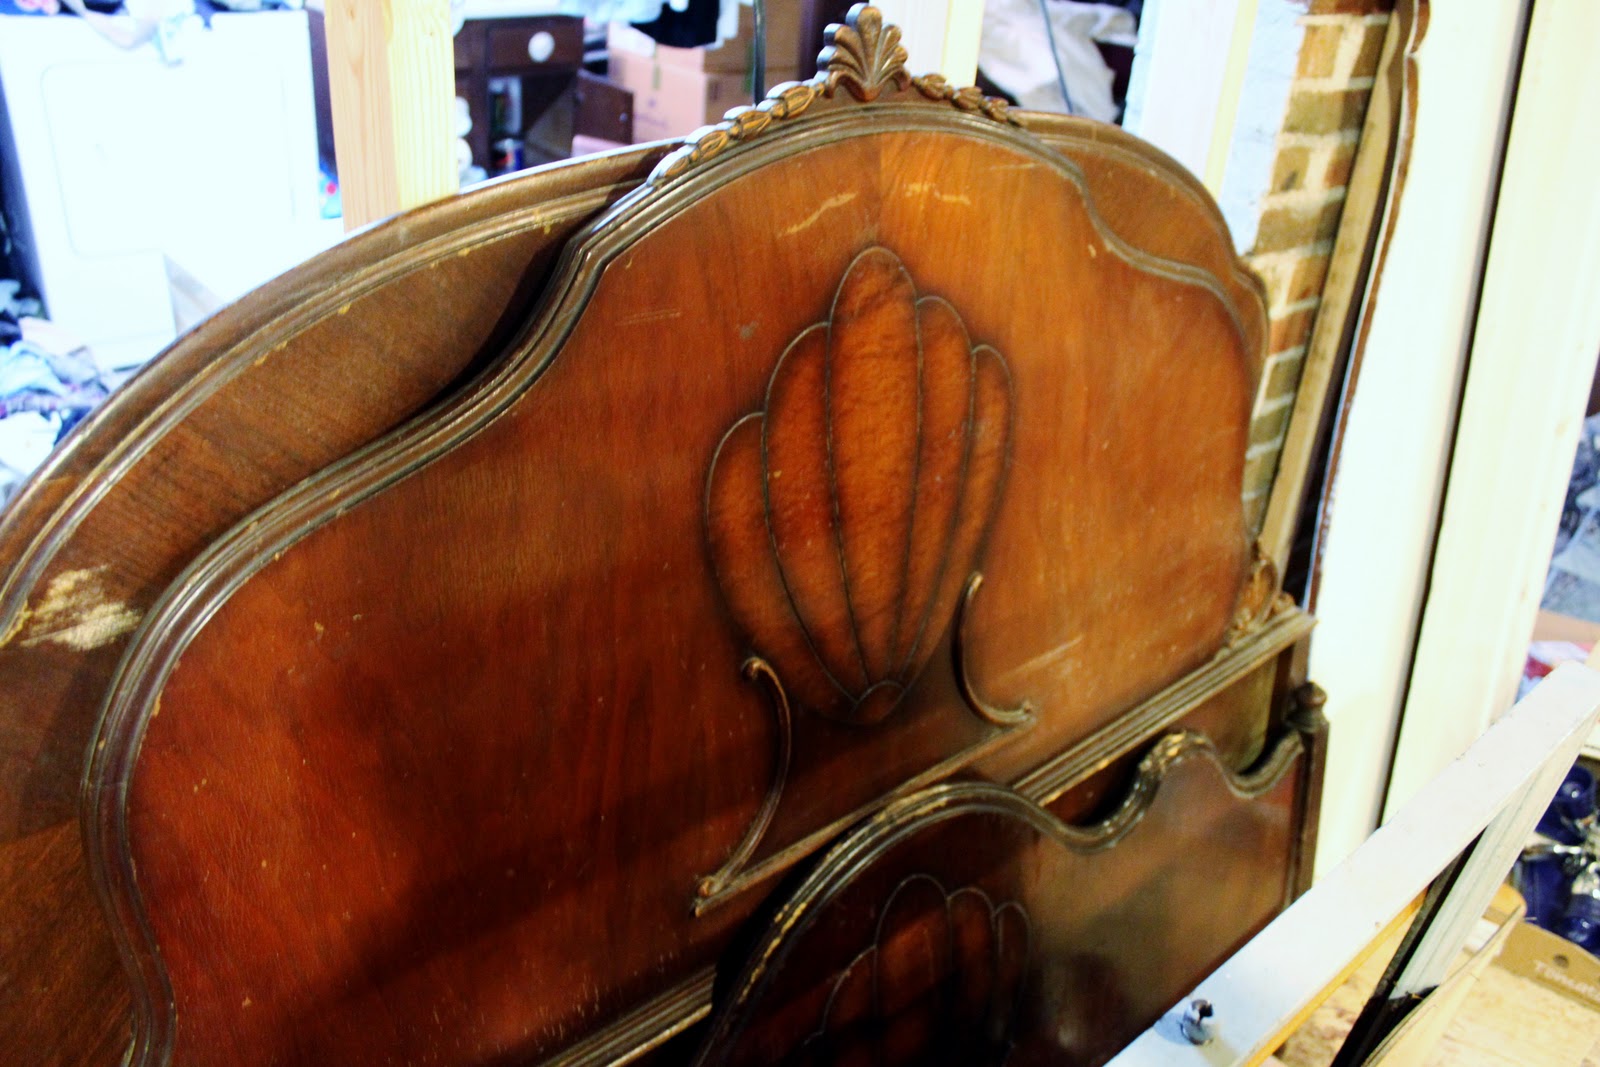
That's a lot of loot from one stop!  But the insanity doesn't stop there...no, no, no.  As we were packing up the last of this, I noticed a lonely headboard.  I asked about the price on it, and found out about another piece as well.  Both came home with me.

(I brought "the muscle" back home with me too.)

This is my piece de resistance.  I can't believe I almost left without "the secretary."  It is never leaving my house.


LOVE.  Okay, so she needs some work.  Her mohogany exterior's been covered with a sloppy mustard yellow paint job, the finial is missing from the top (didn't notice that until I got it home), and one handle is missing.  But did you SEE her feet?

Don't worry if you didn't.  Here's a close up of them, and yes- they're dirty.  I've washed them, but it's going to take quite a bit to get those claws clean.

Ahhh... ball and claw.  Does it get better?  More swooning.


This is a picture of the missing handle.  What's really neat about this desk is that there are two types of handles.  The difference is very small...so small that at close glance you couldn't tell, but it's the points on the bottom of the handle.  I didn't take a picture of the actual other handles, but I found a similar one online to show an example in this side by side.


Neat, eh?  It's the details that matter.  Those little ones really show me that this is a quality piece that a lot of thought went into by the makers.  So, I'm on the hunt for a handle that has points.  Do you have one lying around you'd like me to buy?

(Pictured are the five generations of Lammert's, courtesy of www.stltoday.com)

The maker- that reminds me.  All of the furniture has brass plates showing it was made by Lammert's Furniture of St. Louis, which was a large dealer of fine furniture founded in 1861.  They closed their doors in 2007 after five generations of Lammert's sold their goods.  I later learned from the home owners that when cleaning out the house, they also found an Emmy the previous owner had won from a screenplay.  I'm waiting to find out the name of what she had written, but still...  What a neat find, and how cool to now have the pieces that she picked out for herself once upon a time!

My basement is full, and my paint room is nearing completion.  I'm so eager to work on everything.  This is by far the best furniture stop I've ever had.  I'm so thankful to have met the owners, and shared some time with them; helped them out by taking the furniture off their hands, and picked up a lot of new fun pieces to work on.  Have you ever had a trip where you came back with so many pieces from one stop?


Linking up with 
Furniture Feature Fridays

Monday, September 19, 2011

Chalk paint

Dear Blogland,

I have decided I want NEED to try some Annie Sloan Chalk Paint.

(Photo from www.fromtherightbank.com)

I'm having a really hard time getting over the sticker shock on it's price though.  Please, if you know, tell me where I can buy it without super high shipping.  Unfortunately, there are no shops locally that sell it (that I can see).  If you were just starting out, just testing it, what would you buy?  Do I need the brushes?  If not for the paint, for the wax?  Help a paint-crazy-girl out!

♥-- Kayla

Thursday, September 15, 2011

French end table gets a new 'do.


I picked up this little end table for a song at one of my favorite Salvation Army's at the end of last month.  It was in perfect condition, but was dated.  It had a lot going for it though.  Great legs, great hardware, dovetailed construction, all wood...except for the top.  Unfortunately, it was a wood frame with a caramel color leather insert with gold leaf around the edges.

I was a horrible blogger throughout this and didn't take pictures with my nice camera until the end, so I'll force you to suffer through poor quality phone photos again.

Anyhow, this is how it looked when I brought it home.  If it could talk, I could just imagine it saying "blah."


I went right to work sanding it down, and pulled the leather insert out of the top.


I decided to do a two tone look on the table, so I stained the top, and primed and painted the bottom.  I distressed the edges, and glazed it with a burnt umber glaze mix.  I liked how it looked, but couldn't decide what I wanted to do with that insert.  


So, it sat in my dining room for about a week.  I had thought about a mirror, but it's a pretty shallow insert, and any mirror would have stuck up too high-- plus I just didn't think it would look right with the rest of the style.  Then I thought of painting a design in the center, but I didn't like the idea of leaving the press board exposed, even covered in paint.  Then I found what I was sure would be the ticket.  

Paintable textured wallpaper.


I picked up a roll of this pretty textured wallpaper for $14 at Menards.  The amount I used didn't even make a dent in the roll, so it'll last for many projects to come.  I cut it to fit, and applied it to the insert section the way you would apply it to a wall.  I primed, painted, and glazed it the way I did the bottom of the table, but I didn't like the contrast.  It was just too extreme, and the burnt umber next to the jacobean stain I used on the top was just, yuck.

It occurred to me that if I wanted it to match the rest, I should just stain it.  I was worried about what the result would be, but thought if it didn't work out, I'd just remove it and cut a new piece.  I stained it twice to get a nice dark color that matched the rest of the table top.  The nice thing about the texture on this is that the stain naturally ran down off the high points, leaving them a little lighter, and giving it nice depth.

Once the stain was dry, I went over the entire table with a few coats of polycrylic to protect it.  I left the hardware as it was (just washed it with soap and water), and it's ready to go to a new home!

So, here's the before again (I know...this is SUCH a bad picture.  I'm sorry, friends.)

And after!


Don't you love the extra interest the wallpaper gave it, and how the hardware really pops out from the white?

Stay tuned.  I still have to share some really fun pieces I picked up this week!


Linking to some (lots of) parties:
Twice Owned Tuesday @ House Of Grace
Nifty Thrifty Tuesday @ Coastal Charm
Time to Shine Tuesday @ A Diamond in the Stuff
Tuesday Treasures @ My Uncommon Slice of Suburbia
Power Of Paint @ Domestically Speaking
Swing Into Spring Wednesday @ DIY by Design 
White Wednesday @ Faded Charm
Wow Us Wednesday @ Savvy Southern Style
Piece of Work Wednesday @  Primitive & Proper
Good Life Wednesday @ A Beach Cottage

Open House Thursday @ No Minimalist Here
Strut Your Stuff Thursday @ Somewhat Simple
Transformation Thursday @ The Shabby Chic Cottage
100 Ideas Under $100 @ Beyond The Picket Fence

Furniture Feature Friday @ Miss Mustard Seed
Frugal Friday @ Shabby Nest
Look What I Found Friday @ Vintage Revivals
Feathered Nest Friday @ French Country Cottage

Tuesday, September 13, 2011

One man's trash...

I cannot believe the things people throw away.

I live in a city that encapsulates other, small towns.  It wasn't always that way, but the city has grown so much that it expanded out and around these other small communities until they became cities within a city.  As such, they have their own government and policies.  This particular town is close to my home, and I drive through it often to get from my house to any sort of shopping.  This time of year, they have their annual trash pickup where it seems the citizens can throw literally anything out, and the city picks it up for free.  It's nice to get rid of stuff that's really trash and hard to reuse (old mattresses, broken windows, toilets, etc.), and are difficult for many people to get to the landfill, but it's not always used for that sort of stuff.

And that's when I have an overwhelming feeling of disappointment mixed with a certain amount of anger for my fellow citizens.  I'm not a yuppie person that recycles every piece of trash she can find, but I get really angry when people trash items that just aren't trash.  I also have that overwhelming mom instinct that can hear certain things calling out to me to save them.  What am I to do?  Let them be picked up by a claw and thrown into a dumpster to be crushed?  No.  I can't do that.  Not when it's something good.  Not when it's something old.  Not when it has history.

Hubs is ready to kill me, but I brought home a HEAVY wood paneled door (headboard, anyone?), an antique mirror (mirror was cracked, but the frame is ornate wood, and gorgeous- and don't you know how cute it'll be as a chalkboard?!), a vintage end table in perfect condition, and these two OLD (Victorian?) carved chairs on wooden casters that need one arm repaired with an easy fix, and a new seat, but they are STURDY!

(Sorry for the lack of (quality) pictures...unexpected finds mean cell phone pictures from the driveway, unfortunately!)


Seriously.  Who throws this stuff away?!  Who ruins history by trashing these pieces?  There were so many other items that I couldn't possibly save (unless I wanted a divorce, and a guest appearance on Hoarders) but could only think of the numerous other people who would use them, even buy them... dressers, cabinets, a glass front hutch with one crack in the glass, French doors, shoe racks, end tables... had Habitat for Humanity been called, or a short trip to Goodwill been made, a post made to Freecycle or the free section of Craigslist. There are just so many other options to find new homes for things- for people who are without and need items, or for crazy people like me who just like to fix items up and give them a new life.


I'm glad to have been able to save what I did.  After all that I made a planned trip to St. Louis and picked up some things from a great couple (who certainly must also agree that I'm crazy)...more to share on that later, but I'm so thrilled with what I have!  And boy do I love my husband for putting up with me...

Saturday, September 10, 2011

Placemat pillows

I've seen placemat pillows all over blog land, so this is certainly not a novel idea, but I'm going to show you anyhow because I'm sure there's still someone who hasn't seen it!

Since summer is winding down, a lot of stores have their "summery" placemats on sale, and they are CUTE!  I picked my placemats up for a whopping $.99 each.  When you go to pick up yours, make sure they have two sides (most do), otherwise you'll have a cool cheap placemat, but no pillow.


Anyhow, for this project, you'll need your placemat, a seam ripper, sewing machine with thread (or a needle and thread to hand sew), and polyfil or stuffing from a pillow you already own.  Easy list, right?  This project takes less than twenty minutes, so it really is easy- no reason to complicate it.

Take your seam ripper and open up the shorter end of the pillow with as small of an opening as you can to stuff.  I had to open mine all the way because a) the two layers of fabric were STUCK together and I had to really push hard and wiggle my fingers around to get them separated and b) I used the stuffing from a pillow that had lost it's "fluff" to be comfortable for my every night sleeper, but was still perfect to use in an accent pillow.  Since it wasn't actually polyfil, I needed a wider opening to fit the formed (cut in half) pillow into.


Stuff your pillow, and sew it up!  Pay attention to your thread colors.  My "fruit" pillow had white stitching on the white side and blue on the opposite, so I sewed it with a white bobbin, and blue thread through the upper threading.  Sew sides appropriately, move your stuffing around to get it evenly distributed, and enjoy!


These pillows are so much cuter than the six year old pillows I've been toting around with me that the dogs have chewed the corners off when they were puppies years ago since college...and they were $1 each.  It doesn't get much better than that!  Now go find some fun clearance placemats and make yourself some cute pillows!

P.S.-- I have some fun news.  I sold my first piece!  The little chair I recently showed you found a new home. I let it go at my costs since it was my learner chair, but I'm still thrilled with the feeling of having someone else appreciate my work enough to pay for it.  It sold in less than 24 hours of it's sale posting.  Happy dance!

Wednesday, September 7, 2011

Our Labor Day weekend

I know Labor Day has come and gone, but I'm just getting around to sharing...a few days late.  

We spent our weekend up in the Wisconsin Northwoods at my in-law's cabin.  We fished, played games, and enjoyed each other's company.  It was a welcome, and unexpected break.  Hubs found out on Thursday that he wouldn't have to go in and round, and that we could head up to spend the weekend with his family.  We left the next afternoon.

Hubs had the largest catches of the weekend.


Mason and his cousins had fun looking at the fish...but holding them was out of the question.  The thought of it left us with kids squealing, jumping, and running away.  To give Mason a little credit, he was willing to hold a fish, until he grabbed hold of it and it flipped out of his hands.  Too scary for these toddlers for right now.


As we were heading home, I spotted this AWESOME sale with an entire yard full of antique dressers, chairs, tables, and other oddities.  Hubs reluctantly circled back around and let me browse.  Unfortunately, since my SUV is in the shop with the transmission out, we had a loaner car and nothing big was going to fit with the three of us, two dogs, our luggage, and all the fishing gear we took up.  I did get to buy a cool antique box, and pulley though...

On our way home, we stopped at Hub's grandma's house.  Mason and I picked some apples, we had dinner and visited briefly.  I noticed an old Aunt Jemima Mammy bank near the door, and commented on it, and Grandma Bert told me to take it home!!  Squeel!  I love old cast iron banks.

Then yesterday, Mason and I drove down to my mom's house for dinner.  We brought along some of the fish we brought home from the trip, and picked grapes from my mom's grape vine.  We're (okay, Hubs is) planning to make homemade wine...and if that fails, I'll be making jelly.  :)


How was your Labor Day weekend?  Did you spend time with family, or do anything special?


Thursday, September 1, 2011

Cane chair redo- first time upholstery.

Last post, I left you hanging with a picture...so I'm back to settle your nerves, and show you what it was that you were all looking at.  Here's a little more of the picture.  I think you can see it now, right?!


A few weeks ago I showed you this chair:


I picked it up for $5 at my local Habitat for Humanity.  The frame itself was in good shape, and the caning was perfect, but the seat was stained, and the vintage distressed wood grain style...blech.

I have to admit...this little chair was my very first time upholstering anything.  Because this was such a learning process for me, I didn't take pictures for a step by step for this project, but I'll breeze over basics.

I started out by removing the seat by unscrewing it at the bottom.  From there I started the tedious process of pulling all the staples from the chair using a small flat head screwdriver and a hammer.  While it may be tempting to just rip away to pull the fabric from the chair, don't!  You need to save the material to use as a template to recover your chair.  The padding in this chair was actually really in great shape despite the stains on the cushion, so I saved it to reuse as well.  

*Hint-- have a heavy duty magnet on hand to pick up any stray staples you may drop-- save your vacuum!*

I sanded the frame lightly to remove the shine, and took it outside and sprayed it with Krylon's gloss black spray paint.  Then I coated it with spray gloss polyurethane for extra protection.

I used the old seat fabric as a template and sewed a new seat, doing my best to line patterns up.  This was also my first time making my own bias tape, piping, and double welt cord.  I promise- I'll do a tutorial and all three soon.


Next came stapling the fabric in place, and that's where it went a little hairy for me.  I've always read to pull down and diagonally.  I don't know why, but I read that as PULL!!!!!  

Okay- it's not, alright?  It's about smoothing and making it snug- not pulling the life out of it...like I did.  I pulled too tight on the seat, which made it IMPOSSIBLE to get a smooth, straight edge.  I used my pneumatic staple gun to apply it, and once it was pulled, and stapled, it wasn't coming out unless I wanted to ruin the fabric.

Honestly- I wanted to.  I wanted to rip it off, and resew the bottom/front of the cushion back on, but I was out of fabric to line up the pattern.  I ran back to the store, and OMIGOSH, someone came in and bought the rest of the bolt that morning.  Lucky me, since Jo Ann's is moving in November, they're not getting any new shipments until they move.  I really didn't want to spend another $20 for the fabric with shipping to fix it since it's my "learner" chair.  Lesson two-- allow yourself room to make mistakes, and BUY EXTRA FABRIC!

Remember the buttons I showed you how to cover here?  Yes, I tufted the back of the chair with them.

Are you laughing at me?  Tufting?  An intermediate skill on my first ever chair?  Yes.  Okay, it was silly.  But I tufted it.  It was actually pretty easy (and I'm planning another project with tufting, so I'll show you how to then).  The difficult part of this chair was that there was a channel that ran around the back where the fabric needed to be stapled precisely, or else you'd shoot through the frame.  Ask me how I know!?  It was really discouraging, and made it really hard to apply even pressure and accurately staple.  Next time- no channels.

Anyhow, I stapled the back of the chair on first, from the front, then the front tufted part.  I removed staples ten million times, had to repair some damaged wood, repaint, and restaple a few times, but eventually I got all the fabric on (I seriously hated that channel).  I used heavy duty hot glue to attach my double welt cord, and that was that.  I put it in my sitting area at the top of the stairs next to my cute little $6 red metal stool (swoon!  look at the rust and little wood casters!) topped with a potted indoor fern that I sat down inside a vintage egg basket that I found at The Salvation Army for $1.50 (!!!!!!).

I'll be nice, and save you from scrolling-- the before one more time: 


And After:

P.S.-- I practically STOLE that chandelier, and I have to show you it's before and after still too...as soon as I find 3" socket covers.  I have been SO busy!


Mason's been enjoying having a chair in the little nook too...especially since it's just wide enough to drive his "choo-choo" on.